Smart Jump Starter
Detail Specifications / Descriptions
User Manual
For BP-19101 Jump Starter (with inverter)
Product descriptions
1.Non-polarity clamps
2.Cigarette-lighter port extension
3.Household charger
4.Battery level button
5.Battery level indicator
6.Optical indicator
7.“Charge completed” indicator
8.Power-ON indicator
Protects Car Computer
Non-polarity clamps for carefree jump-starting
Specifications:
A.Uses Taiwan-made highly functional closed lead-acid battery (12V/20AH)
B.Instantaneous current 900A; continuous output current 400A (for gasoline engines under 5,000cc)
C.Both cigarette-lighter port extensions work as 12V power supply with max. 10A current and overload protection
D.75cm-long, 4AGW cable and non-polarity clamps
Battery Upkeep
1.Charge newly-bought unit for about 8-12 hours till (7) “Charge completed” indicator is ON to allow 30 times of continuous use
2.Charge the unit after use till (7) “Charge completed” indicator is ON
3.Charge every 2-3 months when not in use till (7) “Charge completed” indicator is ON.
4.May charge via household charger or cigarette-lighter port extension
5.Battery lasts 2-3 years
Other Functions
Both cigarette-lighter port extensions work as 12V power supply, e.g., as lighting USB port etc. This unit has one-year warranty and NT$20 million product liability insurance.
Note:
1. Do not remove strip seal, otherwise warranty will be declared void.
2. Ambient temperature -20° C~+80° C recommended
Warning:
1.Clamp of the unit is also high-current ON/OFF switch
2.To demonstrate non-polarity, do exactly clamp a battery electrode rather than just touching a battery
Remarks: What should be done when battery is securely clamped yet power-ON indicator is not lit?
Tip 1: It shows power of battery is used up (it happens rarely, with only 1% chance, usually in vehicles being negative ground)
Solution: Use “voltage-free starter cord” (a black probe with round DC outlet) to test negative pole
1.Insert round, DC end of cord into household charger outlet
2.When power-ON indicator is lit, pull the cord out and then start engine
Tip 2: Attachment – Output extension (a female cigarette-lighter socket and compact positive/negative-pole clips)
(Plug male end of car charging cable into female socket of cigarette-charger port extension.)
This is the only attachment to show output polarity to allow sub-10A DC output.
Tip 3: Attachment – Car charging cable (two male cigarette-lighter adaptors)
To charge in driving, plug either male cigarette-lighter adaptor into female socket of the unit, and then plug the other into car cigarette-lighter socket.
(Practice only when engine is running)
Warning: 12V charging should be no more than 4 continuous hours to avoid damaging battery inside clamp
Accessories
Charging Applications
Household charger AC110V to DC12V
Automotive charger DC12V charging in car
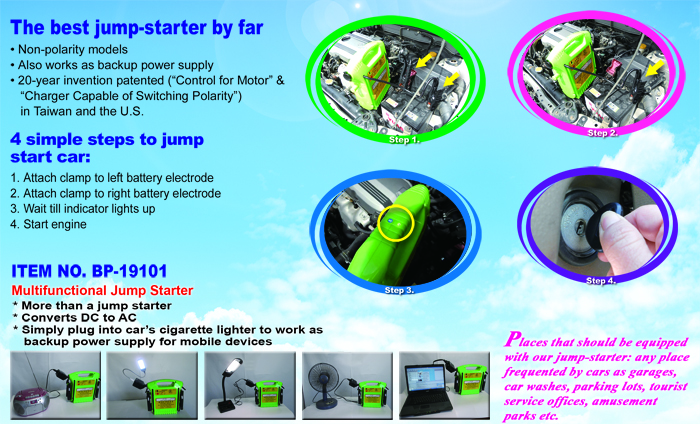
DC-to-AC Adaptor Applications for Electrical Home Appliances (12V/20AH for 240W/hr)
For Notebook PC (30-50W/hr for about 8 hrs)
For electric fan (30-60W/hr for about 8 hrs)
For radio (50-100W/hr for about 5 hrs)
For desk lamp (30-60W/hr about 8 hrs)
USB Port Applications
Charging cell-phone USB
Charging camera USB
Charging USB LED
Power output adaptor
Power-ON indicator


